
You, Mix And Kubee...
It’s with a bit of a heavy heart, that I am writing this post. You see, a few months ago, I had the wild idea to present on this very topic at ElixirConf later this year. Sadly my awesome proposal for the Magic Kingdom got, well… frozen by the now infamous Dr Freeze ;-) But thanks to the wonderful song (not!) I’ve now chosen to Let it go!…
As I dive a bit deeper into the wonderful world of Elixir and Phoenix, I find, as expected, the deployment landscape to be a bit bleak. Having to resort to bash or variations of Capistrano feels border line Jurassic to me.
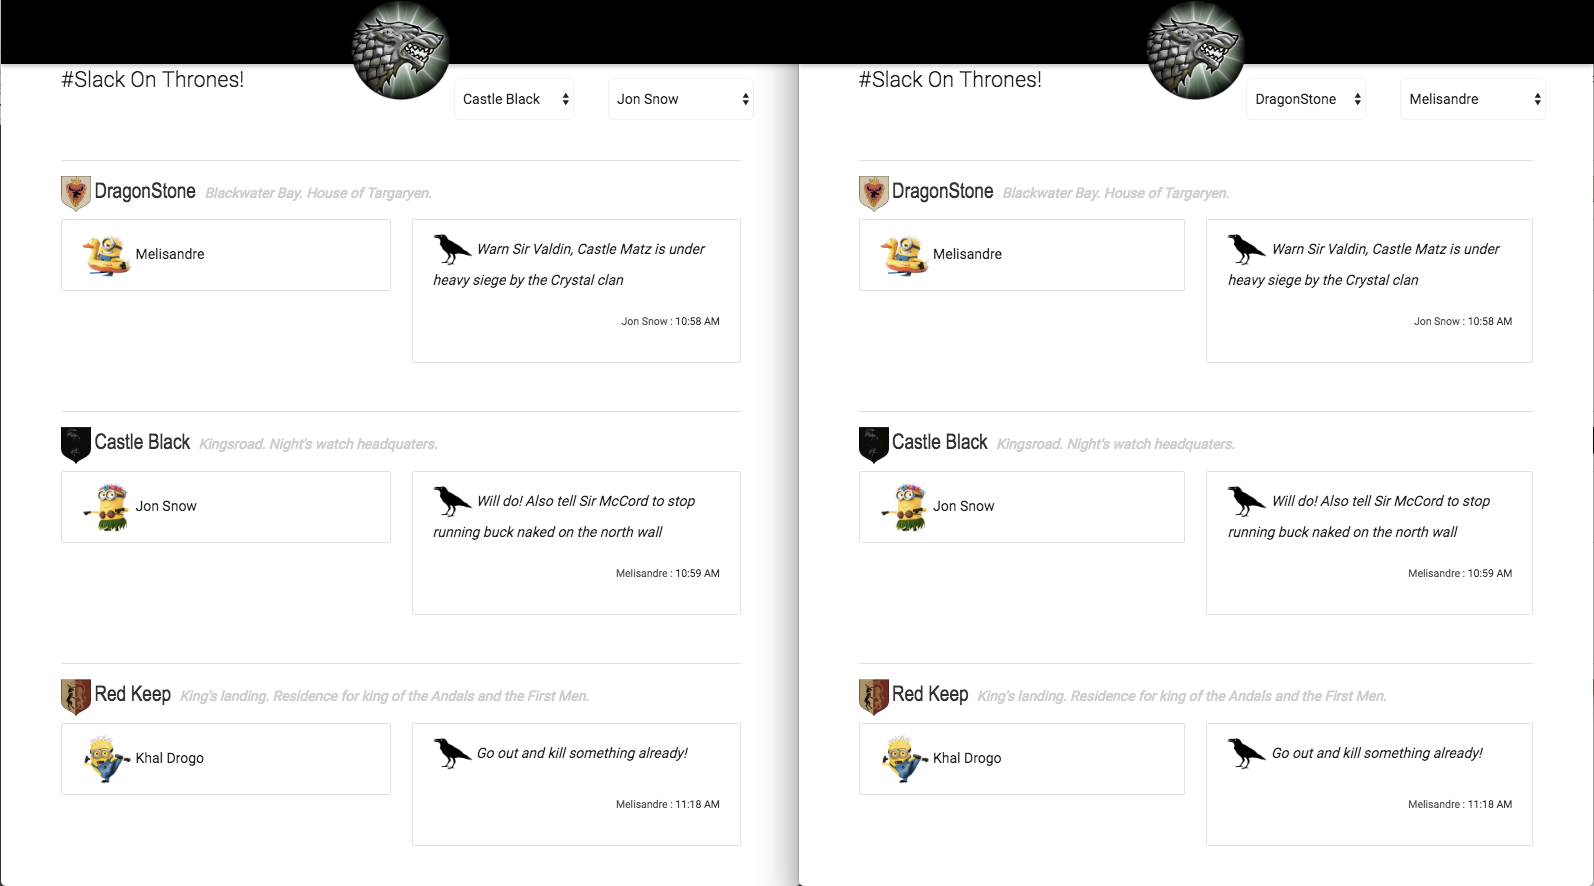
A while ago, as I was kicking tires with Phoenix and Angular2, I came up with my Slack On Thrones demo application that allows its users to send ravens among castles and even tracks the lords (minions) at the various castles by leveraging Phoenix channels and presence. Big CReDiTs to Mr McCord here for providing us with such a wonderful affordance!
The Slack On Thrones application is composed of multiple components. An Angular2 front end piece that interacts with a Phoenix API service to display castles and minions as well as provides castle channels to enable raven messages to be exchanged between castles. Association between castles and minions is provided via a presence channel that tracks movement of minions across castles. Lastly, castles and minions are persisted in a Postgres database.
Here is a screen shot of the application illustrating channels and presence on two browser windows with ravens flying between castles. On the go users? No worries, the mobile version is coming soon…
Alrighty then!! Now what? At this point an overwhelming feeling of staring at a dead dog’s butthole may overcome you. How can I deploy this wonderful contraption?
Luckily in a not so distant past, I’ve been using Kubernetes to deploy a pretty elaborate Go microservices stack and figured why not give it a go (punt intended!) with this application?
So let’s go!!
NOTE: For the following, I am using Kubernetes V1.3.3 and running Vagrant locally. For this example one minion suffice, but one can imagine starting a cluster of collaborating Phoenix servers and leverage several vagrant minions for that purpose…
NOTE: I am using a local Docker registry that I’ve blogged about previously Kubernetes: Own Your Docker Registry Already!
Why the link you might ask? For the smart asses out there, it’s true since as of this writing, I only have two posts out there and you’re reading one of them ;-)
The Postgres Service
For our deployment, I am using the official postgres image. In all the following configs, I am using 2 files to define the Kubernetes deployment and associated service. Namely dp.yml and svc.yml as I find it easier to manage that way.
NOTE: I leverage labels here for deployment group and application. This affords for easily finding various entities by label or whipping clean the whole install by doing things like -lgroup=derailed or -lapp=blee within the Kubernetes cli.
# configs/postgres/dp.yml
kind:       Deployment
apiVersion: extensions/v1beta1
metadata:
  name: postgres
  labels:
    group: derailed
    app:   postgres
spec:
  replicas: 1
  template:
    metadata:
      labels:
        group: derailed
        app:   postgres
    spec:
      containers:
        - name:  postgres
          image: postgres
          env:
            - name:  POSTGRES_USER
              value: fernand
            - name:  POSTGRES_PASSWORD
              value: BumbleBeeTuna!
          ports:
            - containerPort: 5432
              name:          client
          volumeMounts:
            - mountPath: /data
              name:      data
      volumes:
        - name:     data
          emptyDir: {}
And the associated service…
NOTE: This service ip/port will be available externally to my local machine. It does not have to be exposed that way, but I find it convenient to be able to throw the postgres cli locally on it so I can inspect my schema and tables.
# configs/postgres/svc.yml
kind:       Service
apiVersion: v1
metadata:
  name: postgres
  labels:
    group: derailed
    app:   postgres
spec:
  type: LoadBalancer
  selector:
    app: postgres
  ports:
    - name:       client
      port:       5432
      targetPort: client
status:
  loadBalancer:
    ingress:
      - ip: 0.0.0.0
We can hydrate this easily using the following Kubernetes command
# Hydrate postgres
ku create -f configs/postgres/dp.yml -f configs/postgres/svc.yml
# Check for happiness?
ku get po -lapp=postgres
With me so far? Cool deal, let’s fly the Phoenix next…
The Phoenix Service
A lot going on here. If you are using your own Docker Registry you can push and pull your service Docker image directly from your localhost by replacing YOUR_VAGRANT_MINION_IP YOUR_DOCKER_REGISTRY_POST with your own. With my lame ass upload speed, I find it incredibly useful to do so. If not, you can push your service image on DockerHub or others then you can specify your external registry url for the image attribute.
In my Phoenix Dockerfile, I specify a bash start script that checks whether CREATE_DB env is set, if so it will proceed by invoking mix.ecto.create and mix.ecto.migrate as well as seeding the new database with a sample of castles and minions. Finally, the script will invoke mix phoenix.server to fire off the beam and supervisor tree.
Lastly, note the reference to POSTGRES_SERVICE_HOST env which refers to our previously defined Postgres service. This is where Kubernetes really shines linking service IP by name across nodes via the SkyDNS addon.
# configs/sot/dp.yml
kind:       Deployment
apiVersion: extensions/v1beta1
metadata:
  name: phoenix
  labels:
    group: derailed
    app:   phoenix
spec:
  replicas: 1
  template:
    metadata:
      labels:
        group: derailed
        app:   phoenix
    spec:
      containers:
        - name:  phoenix
          image: YOUR_VAGRANT_MINION_IP:YOUR_DOCKER_REGISTRY_PORT/sotsvc:0.0.1
          ports:
            - containerPort: 4000
              name:          api
          env:
          - name:  CREATE_DB
            value: "true"
          - name:  PG_DB_NAME
            value: sotsvc_k8s
          - name:  PORT
            value: "4000"
          - name:  POSTGRES_SERVICE_HOST
            value: postgres
          - name:  POSTGRES_SERVICE_PORT_CLIENT
            value: "5432"
Now the service definition…
# configs/sot/svc.yml
kind:       Service
apiVersion: v1
metadata:
  name: phoenix
  labels:
    group: derailed
    app:   phoenix
spec:
  type: LoadBalancer
  selector:
    app: phoenix
  ports:
    - name:       api
      port:       4000
      targetPort: api
status:
  loadBalancer:
    ingress:
      - ip: 0.0.0.0
Let’s hydrate the service and make sure we’re cool..
ku create -f configs/sot/dp.yml -f configs/sot/svc.yml
# Checking all is cool in SOT land
ku get po -lapp=phoenix
# Grab the service port
ku describe svc phoenix | grep NodePort
# Grab the minion ip
ku describe no | grep Addresses
# Checking out the castle API endpoint
curl -XGET "http://MINION_IP:PHOENIX_SVC_PORT/api/castles"
Now that we are happy as a hippo, we need our last piece of the puzzle ie our Angular2 front end.
The Angular2 FrontEnd
Same drill. Define the deployment and service. The angular front end is served via nginx. The thing here to remember is the angular components that need to populate castles/minions and access the castles channels and presence channel need to access the public interface to our lotsvc defined above. So make note of the ip and port that we digged out in the previous section as they need to be configure in our angular application.
# configs/ng2/dp.yml
kind:       Deployment
apiVersion: extensions/v1beta1
metadata:
  name: ng2
  labels:
    group: derailed
    app:   ng2
spec:
  replicas: 1
  template:
    metadata:
      labels:
        group: derailed
        app:   ng2
    spec:
      containers:
        - name:  ng2
          image: YOUR_VAGRANT_MINION_IP:YOUR_DOCKER_REGISTRY_PORT/sot-ng:0.0.1
          ports:
            - containerPort: 80
              name:          http
Now the service configuration…
NOTE: Once again, we need to expose the port for the angular application so we can hit it from our local browser.
# configs/ng2/svc.yml
kind:       Service
apiVersion: v1
metadata:
  name: ng2
  labels:
    group: derailed
    app:   ng2
spec:
  type: LoadBalancer
  selector:
    app: ng2
  ports:
    - name:       http
      port:       5000
      targetPort: http
status:
  loadBalancer:
    ingress:
      - ip: 0.0.0.0
Let’s hydrate the ng app…
ku create -f configs/ng2/dp.yml -f configs/ng2/svc.yml
# Make sure we're happy...
ku get po -lapp=ng2
# Grab the Angular2 app port
ku describe svc ng2 | grep NodePort
You Are Here!
So now we have our full stack up and running. Let’s assume your vagrant minion IP is 10.10.10.1 and your ng2 service is accessible on port 30123.
Last and certainly not least, open up your browser at http://10.10.10.1:30123 and observe your marvel. You now have an operational and might I add, cool, microservice stack up and running and orchestrated by K8s. You now have access to all the goodness of Kubernetes at your disposal, service discovery, rolling updates, etc…
Likewise, with a few commands your co-worker can share and contribute to your creation in terms of both code and deployment. What’s more, you can use the same configurations and you’ll be up and running on AWS, GCE, (insert fav provider here) and share it with the world.
This in an exciting time to be in Dev/DevOps land!
AndJoy!!